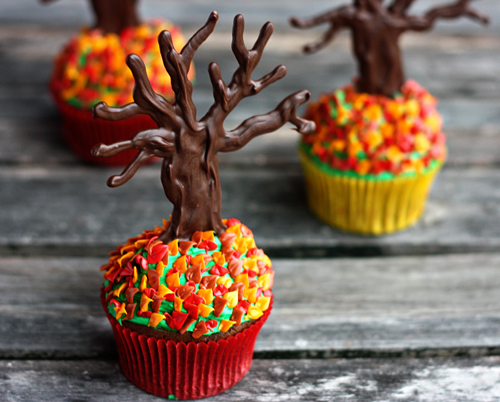
End of Fall Cupcakes
![]() By Eat More Chocolate Team Cake & Cupcakes Fall Favorites Baking
By Eat More Chocolate Team Cake & Cupcakes Fall Favorites Baking
April 21, 2015
Time to break out the rake!

Directions
Using clip-art I found online, I made the trees first. Print out a piece of paper with several different copies of the same picture. Slip the paper into a sheet protector and wipe it with shortening.
Melt some brown candy melts according to the directions on the package. Place chocolate into a disposable pastry bag and snip off the tip. All you have to do is pipe the candy using the picture as your guide.
Mix the cake mix, pumpkin, eggs, and spices together in a large bowl. Beat with a handheld mixer for about 2 minutes on medium speed. Bake according to the directions for the cake mix. Allow to cool.
Tint 16 ounces of frosting leaf green. Frost the cupcakes with green icing – no worries if it isn’t perfect!
Add a tree to the top of each cupcake, pressing down gently.
Use a knife to cover the bottom of the tree with the green icing. If your tree seems a bit unstable, use a toothpick for support, pushing it into the cupcake behind the tree. Just make sure you warn any unsuspecting cupcake eaters!
Tint the rest of the icing equal parts red, brown/copper, and yellow. Put your first color into a pastry bag fitted with a #66 tip (small leaf tip). I started with red. Before piping, I put the pastry bag in the fridge for about 5 minutes. This helped the leaves keep their shape.
Repeat with all remaining leaf colors until desired look is achieved.
Pipe leaves all around the cupcake, leaving space to add additional colored leaves.